Google Chrome is the most used web browser worldwide. Chrome Extensions are a great way of expanding and adding to its functionality. While Google does offer a pretty comprehensive and elemental guide to build an extension, it only covers the basics. Complicated and expansive extensions can be challenging and time-consuming to make. Under such circumstances reaching out to third-party companies such as PolyUno is a great idea. Our team at PolyUno are experts and have years of experience building complicated and elaborate Chrome extensions. This article is a guide on how to create a Chrome extension.
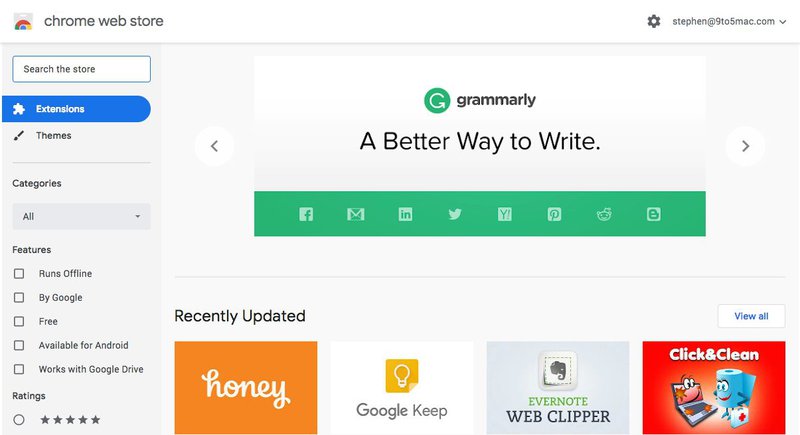
Before we get on answering the question about how to create a Chrome extension and the subsequent steps involved, it’s essential to understand what a Chrome extension is.
At its very core, chrome extensions are HTML and JavaScript that work together to add features and functionality to Chrome. Simply put, an extension is just a webpage that sports a slightly different Application Programming Interface or API.
By the end of the steps mentioned below, the structure of the entire directory should be as given below-
The very first thing you need to create before proceeding is a PROJECT FOLDER. The Project Folder will contain all the relevant and necessary files for the extension.
Next, you’ll need to create a MANIFEST FILE. All chrome extensions require a manifest.json file containing valuable information about the extension like its version, name, permissions, and actions.
Create a manifest.json file by entering the following code into the empty directory:
{
"manifest_version": 2,
"name": "My First Extension",
"version": "0.1"
}
By entering this part of the code into the directory, you do nothing more than just loading an extension onto Chrome. Below we talk about adding life and functionality to your extension.
Two things you must remember when creating the manifest file-
Once you have created your manifest file, it’s time to lead your extension onto Chrome. To do so, enter chrome://extensions/ on your web browser and click the button on the top right to turn on DEVELOPER MODE. Once you have done that, click on LOAD UNPACKED located in the top left.
Now find the directory with the manifest folder, and after selecting the folder, the extension will be displayed below. Refresh by clicking the small icon on the right side of the extension to see any changes you made to the code.
A content script is merely a JavaScript file that runs in the context of web pages, which means it interacts with web pages that the browser visits. They can modify and read web pages and transfer information to their parent extension by employing the standard Document Object Model (DOM). Content Scripts can access chrome APIs used by their parent extension and exchange messages with their parent extensions.
Content scripts are wholly detached from the external environment, enabling them to alter their JavaScript environment without affecting the web page or other content scripts.
In short, contact scripts can access and alter web pages that the browser visits. This ability makes them stand apart from the other JavaScript files that are included in the project. You must add the content_scripts section to the MANIFEST file and their details, such as which web pages they can access.
To sum up, content scripts can access and implement modifications to the browser visits’ web pages. This sets them apart from other JavaScript files in the project. You must declare content scripts and their details (e.g., the URL) in the manifest.json file.
There are two main methods of injecting Content Scripts into the webpage-
For this particular example, we will be looking at the programmatic method. You need to give the active tab permission to enable the script to run on the currently active tab.
Permissions: Depending on what your extension needs to do, you may have to enter a permissions section to allow it access to various files and folders.
To do so, update your manifest.json by adding the following to it-

Once you’ve added the Permission sections, you can now inject the content scripts into the web page. You can inject the entire file itself or just a part of the code. For this particular example, we will show you how to inject the contentScript.js as a whole javascript file. Once the file has been injected, the script will modify the YouTube player window to show the player controls with lower opacity.
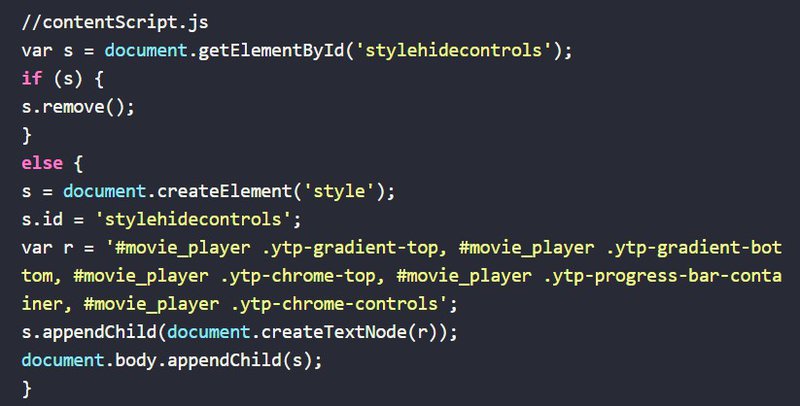
Here is how we came up with the code above-
And there you have it, the new style will take effect almost immediately, and the opacity of the video controls will be reduced.
To programmatically inject a content script, you need a javascript that runs in the background and is constantly on the lookout for a click event. Content scripts themselves are incapable of listening to click events. Therefore to perform this task, we need a BACKGROUND SCRIPT that can access Chrome API but not the webpage. The background script injects the content script into the web page so that the content script can access and alter the page.
This is how you declare the background script page in the manifest file-

In this example, the background script is accountable for hearing the click event and then injecting the contentScript.js file into the webpage.
Therefore, For this example, the contents on the background script are-

Declarative is another method of injecting content scripts into the webpage. No background files are needed to inject content scripts into the manifest.json file declaratively. You can just enter the following into the manifest.json file and be done with-
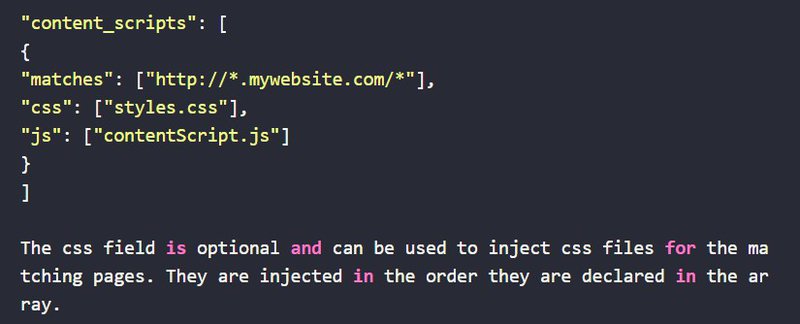
There are two types of actions for Chrome Extensions-
Using ACTIONS, you can even add popups and icons to the extension.
To insert an icon, just add the following to the manifest.json file-

Use applications like Photoshop, Illustrator, or Gimp to create icons of any shape and size. Once you have acquired the icon, station it with the current name in the root folder. You’ll notice a 32 by 32 size icon in the main toolbar chrome.
Once you have added all the tidbits, features, and sections mentioned above, the entirety of your manifest.json file should look something like this-
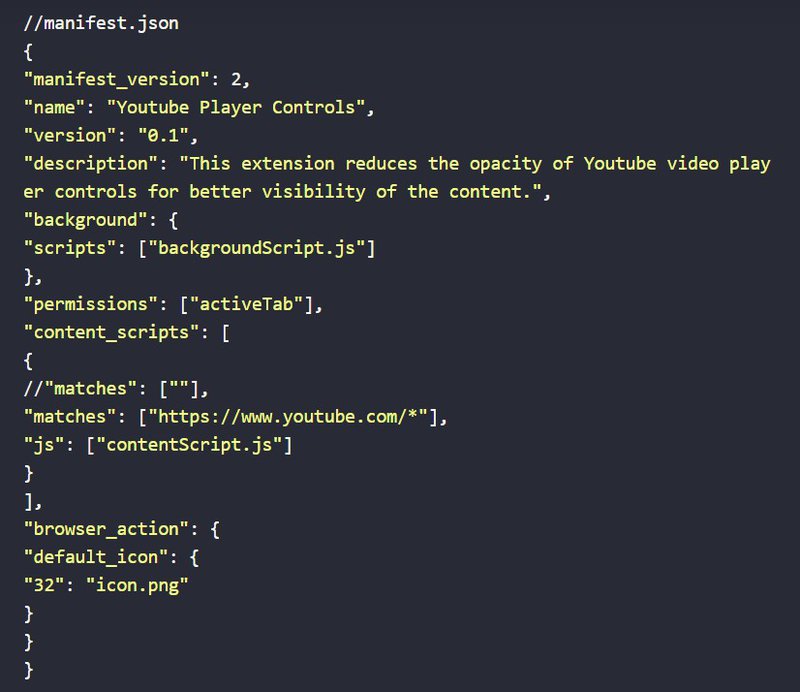
The process involved to create a Chrome extension can be both straightforward and highly complicated. It all comes down to how experienced you are and what kind of extension you are trying to make. But fret not; our expert software development team is always here to solve any issues you may have. Just contact us here.